If you have the NextGen gallery plugin installed on your WordPress website you can easily add images to a gallery by following these instructions.
Before you begin…
A little bit of preparation is required before you start adding the images to your website.
- Organise your files – gather all the images you would like to add to your gallery and put them in a folder on your computer. Give the folder a logical name e.g. Website Gallery or Christmas Ball Gallery. This is so you can find them easily when you are uploading the pictures to the website.
- Check the image size – most digital cameras these days are set to take photos at a high resolution. This is great for print quality but when you are adding photos to your website you need to ensure they will download quickly while still maintaining a good visual quality. Right click on the image file and choose ‘Properties’. On the ‘Details’ tab you can view the dimensions of the image (dimensions are displayed as width x height). As a rule of thumb, the maximum width or height allowed is 800 pixels.
- Resize your image – if your image is greater than 800 pixels wide / high you should resize it. Use image software that you are familiar with, we recommend VSO Image Resizer.
Create a Gallery
First off, we need to create a gallery for your pictures.
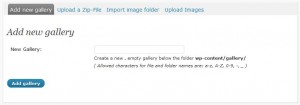
- In the Gallery menu section (located on the left hand side of the dashboard area), click ‘Add Gallery / Images‘
- Enter a Name for your new gallery and click the Add Gallery button.
- Done – your gallery has been created. Now lets add some images to it.
Add Images to Your Gallery
- In the Gallery menu section (located on the left hand side of the dashboard area), click ‘Add Gallery / Images‘
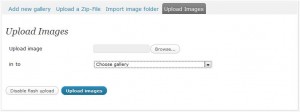
- Click the ‘Upload Images‘ tab
- Browse for your images on your computer, disk, etc
- Choose the gallery where you would like to insert the images
- Click ‘Upload Images‘ button
- Wait for the upload to complete, then you can navigate away from the page. The images are automatically included in the gallery when it is displayed on the pages of your website.
Display a Gallery on a Page or Post
Now that you have successfully created your gallery and added you images, you will want to display the gallery on your website.
- Open a Page or Post to edit the content
- Click your cursor on the area of the page where you would like to display your gallery (Note: you can give your gallery a sub heading if you like).
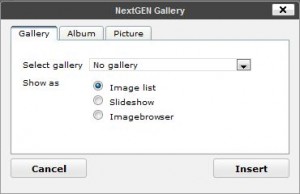
- Click on the Add NextGEN Gallery button on your toolbar (it’s the end right of the first row of buttons)

- Select a gallery from the dropdown menu, and click the Insert button.
- You will notice some text has been added to your article e.g.
no images were found
- Save your changes by clicking the Update button.


Comments are closed.